EN
 SP
 FR

- Home
- About Us
- Products
- Service
- Project
- News
- Contact Us
Pulished on Oct. 23, 2026
Installing a welded wire fence involves more than attaching mesh panels or rolls to posts. A durable installation begins with accurate site measurements, suitable post foundations, properly aligned supports, secure mesh connections, and careful inspection.
For contractors, agricultural property owners, warehouse operators, and fencing distributors, understanding the installation sequence helps reduce rework, material waste, and common site problems.
This guide explains how to install welded wire fencing step by step, covering site preparation, post layout, foundation work, mesh installation, corners, uneven ground, and final inspection. The instructions apply to common welded wire fence systems, but the exact method will depend on whether the project uses welded wire mesh rolls, rigid welded mesh panels, or a complete fencing system.
1. Choose the Right Welded Wire Fence System
Before starting installation, confirm which type of welded wire fence the project requires. Different products need different support systems and installation methods.
Welded wire mesh rolls
Flexible welded wire mesh rolls are commonly used for gardens, agricultural boundaries, animal enclosures, and selected general-purpose fencing applications.
They can follow some changes in ground level more easily than rigid panels, but they need suitable tensioning and fastening arrangements. The mesh should be secured without damaging the welded intersections or distorting the openings.
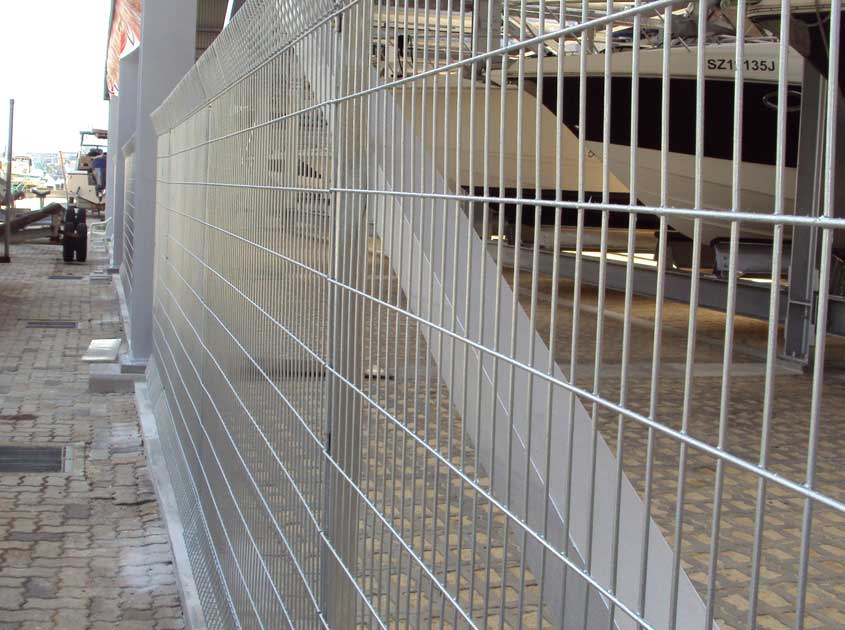
Rigid welded wire fence panels
Rigid panels are often used around commercial properties, industrial facilities, schools, storage areas, and residential boundaries.
Their stiffness helps maintain a consistent appearance, but accurate post positioning is particularly important. Incorrect post spacing can make panel installation difficult or place unwanted stress on the connections.
Define the project requirements first
Before ordering materials, confirm:
Fence height and total boundary length
Mesh opening and wire diameter
Roll or panel dimensions
Post type, dimensions, and spacing
Required gates, corners, and end posts
Surface treatment and corrosion-protection requirements
Ground conditions and expected exposure to wind or impact
Any applicable local regulations or project specifications
A product intended for light garden protection should not automatically be used as a high-security or heavy-duty perimeter fence.
2. Prepare the Tools and Materials
Having the correct materials ready before installation makes the work more efficient and helps avoid inconsistent connections.
Common tools and materials include:
Measuring tape and marking line
Stakes and suitable marking equipment
Level or laser level
Post-hole digging equipment
Shovel and hand tools
Cutting tools suitable for the specified wire
Wrenches or fastening tools, as required
Compatible fence posts and brackets
Approved clamps, ties, clips, or fasteners
Concrete or other specified post-fixing materials
Personal protective equipment, including gloves and eye protection
For larger commercial projects, it is also helpful to have the installation drawing, post schedule, panel layout, and gate details available on site.
Practical tip: Check that the posts, mesh, fasteners, and coating systems are compatible. Mixing unsuitable metals or using inappropriate fasteners can create connection problems and may increase corrosion risk.
3. Step One: Measure the Site and Mark the Fence Line
Accurate layout is the foundation of a good fence installation.
Start by walking the proposed boundary and identifying corners, changes in direction, gates, obstacles, and changes in ground elevation. Check property boundaries and underground utility locations before digging.
Next, mark the fence line using stakes and a string line where practical.
Measure each straight section separately instead of estimating the total length from a rough visual inspection. Record the positions of gates and corners because these locations may require different posts or additional support.
Calculate the number of posts
For a straight fence section, a preliminary estimate can be made using the section length and the planned post spacing.
Number of spaces = fence section length ÷ planned post spacing
For example, if a straight section is 24 meters long and the preliminary spacing is 3 meters:
24 ÷ 3 = 8 spaces
That section would require 9 post positions if both ends are included.
This is only a layout example. The actual spacing must follow the selected fence system, mesh or panel dimensions, expected loads, and project requirements. Corners, gates, ends, and changes in direction may need additional or different posts.
Do not finalize the material order until the layout has been checked against the actual panel or roll dimensions.
4. Step Two: Set Out the Posts
Post positioning depends on the type of welded wire fence being installed.
For rigid panels, the distance between posts must match the panel dimensions and the manufacturer's connection details. Allowing for brackets or connection hardware may affect the required clear opening between posts.
For welded wire mesh rolls, the post spacing depends on mesh stiffness, fence height, the fastening method, and the support system.
Mark each post location along the fence line. Double-check the positions at corners, gates, and ends before digging.
Why corner and end posts matter
Corner posts often experience forces from two fence directions. End posts can also experience substantial pull from the attached mesh, particularly where a tensioning system is used.
These posts may require different dimensions, foundations, braces, or anchoring details from intermediate posts.
Use the approved design rather than assuming that every post can be installed in the same way.
5. Step Three: Install the Posts and Foundations
Post installation affects the fence's alignment, stability, and long-term performance.
The foundation method depends on soil conditions, fence height, post design, wind exposure, and local requirements. Posts may be installed in concrete foundations or by another approved method appropriate to the system and site.
A typical installation sequence is:
Dig the post holes to the specified dimensions.
Remove loose material that could interfere with the foundation.
Position the post at the marked location.
Check vertical alignment using a level.
Set the post at the required height and orientation.
Secure the post using the specified foundation method.
Recheck alignment before the foundation material sets or the post-fixing system is finalized.
Where concrete is used, follow the specified mix, placement, and curing requirements. Do not apply substantial loads to newly installed posts before the foundation has developed the required strength.
Common foundation mistakes
Posts are not vertical. Even small alignment errors can become obvious across a long fence run.
Foundation dimensions are guessed. A foundation that works in firm, sheltered ground may be unsuitable in loose soil or an exposed location.
Posts are installed before the layout is verified. Correcting a misplaced post after the foundation has set can create significant rework.
Drainage is ignored. Persistent water around posts can contribute to deterioration depending on the post material, coating, soil chemistry, and foundation details.
6. Step Four: Install Welded Wire Fence Panels or Rolls
Once the posts and foundations are ready for installation, the mesh can be attached.
The installation method differs between rigid panels and flexible rolls.
Installing rigid welded wire panels
Position the first panel against the designated posts.
Align the panel with the intended fence height and ground clearance.
Attach the panel using the specified brackets, clamps, or fasteners.
Check horizontal alignment and vertical position.
Install the next panel, confirming that the joint and post spacing match the system design.
Continue along the fence line, checking alignment at regular intervals.
Avoid forcing a panel into a gap that is too narrow. Excessive pressure may bend the panel, damage the coating, or overload the connection points.
Installing welded wire mesh rolls
Unroll a manageable section along the fence line.
Position the mesh at the required height.
Attach it securely to the starting post.
Progressively fasten the mesh to intermediate posts.
Use an appropriate tensioning method where the product and system require it.
Attach the mesh to the end post using the specified connection method.
Check the mesh for sagging, distorted openings, and loose connections.
Flexible mesh should be supported and tensioned according to its design. Excessive tension can distort the openings or place unwanted stress on welded intersections and posts.
Never assume that a roll product can be tensioned in the same way as chain link fencing. The suitable method depends on the welded mesh construction and the manufacturer's instructions.
7. Step Five: Secure the Connections and Finish the Edges
Connections help transfer loads from the mesh to the posts. Their suitability matters as much as the mesh itself.
Use fasteners compatible with the posts, mesh wire, coating, and exposure conditions. Install them at the locations and intervals required by the fence system.
Inspect each connection for:
Correct fastener type
Secure attachment to the post
Consistent spacing
No excessive deformation of the mesh
No sharp wire ends projecting into accessible areas
No obvious damage to protective coatings
If cutting is required, use a suitable tool and handle the cut edges carefully. Exposed steel may need an appropriate repair treatment where the product specification calls for it.
Do not substitute ordinary ties or improvised connections for structural brackets where the system requires engineered or manufacturer-specified hardware.
8. Step Six: Handle Corners, Gates, and Uneven Ground
These areas often require more attention than straight fence sections.
Corners and changes in direction
At a corner, the fence changes direction and the post may experience loads from multiple sides. Use the specified corner post and bracing arrangement.
Check that panels meet neatly and that fasteners do not interfere with the adjacent section. For roll mesh, avoid pulling the mesh around a corner in a way that excessively distorts the openings.
Gates and openings
Gate posts may experience repeated movement and additional loads. Their foundations, dimensions, hinges, and latching hardware should match the gate design.
Confirm the finished gate opening before fixing adjacent panels or cutting mesh. Leave the required operating clearance so the gate can open and close without dragging on the ground.
Sloping ground
There are two common approaches to following sloping ground.
Stepped installation: Panels remain approximately level, with height differences between successive sections. This method can suit rigid panels when the system and site layout allow it, but it may create gaps beneath the fence.
Raked installation: The fence follows the slope of the ground. This may work with certain flexible mesh systems or specially designed panels, but not every rigid welded wire panel can be installed this way.
Choose the method based on panel geometry, ground slope, required ground clearance, drainage, and the need to prevent animals or people from passing beneath the fence.
9. Step Seven: Inspect the Finished Fence
A final inspection should check both appearance and function.
Use the original drawings and specifications rather than relying only on visual judgment.
Inspection item
What to check
Fence alignment Posts and panels follow the intended boundary
Post stability No obvious movement or loose foundations
Fence height Matches the approved specification
Panel or roll fit Mesh is properly positioned without unacceptable distortion
Fasteners Connections are secure and compatible
Cut edges No unacceptable sharp projections or untreated damage
Gate operation Gate opens, closes, and latches correctly
Ground clearance Gaps are consistent with the project requirements
Coating condition No significant visible damage from handling or installation
Site cleanup Cut wire, packaging, and other debris are removed
For commercial and industrial projects, document any deviations and correct them before handover. Where the contract requires it, record post locations, foundation details, inspection results, and material information.
10. Common Welded Wire Fence Installation Mistakes
Even good-quality mesh can produce a poor result if the installation is not planned carefully.
Incorrect post spacing: Panels may not fit properly, while roll mesh may sag or require unsuitable connections.
Insufficient corner support: Corner and end posts may experience higher loads than intermediate posts.
Over-tensioning flexible mesh: Excessive pulling can distort openings or stress welded intersections.
Ignoring ground changes: Unplanned slopes can create large gaps beneath the fence or make rigid panels difficult to install.
Using incompatible fasteners: Unsuitable connections can loosen or contribute to corrosion problems.
Skipping the final inspection: Small alignment or fastening issues can become more difficult to correct after the site is handed over.
Most of these problems can be reduced by confirming the layout, selecting the correct fence system, and following the approved installation details before work begins.
Frequently Asked Questions
How far apart should welded wire fence posts be?
There is no single spacing that suits every welded wire fence. Post spacing depends on panel length, mesh stiffness, fence height, support design, wind exposure, and manufacturer requirements. For rigid panels, the post layout must match the specified panel and connection dimensions.
Can welded wire mesh rolls be installed on sloping ground?
Some flexible welded wire mesh rolls can follow changes in ground elevation when supported and installed appropriately. The amount of tension, post arrangement, and fastening method should suit the mesh construction and the site. Check the product instructions before installation.
Should welded wire fence posts be set in concrete?
Concrete foundations are common in many applications, but they are not the only possible method. The appropriate foundation depends on the post system, soil conditions, loads, and local requirements. Follow the approved design.
Can welded wire fence panels be cut to fit?
Some panels can be cut when necessary, provided the manufacturer allows it and the correct tools are used. Cutting can expose steel at the edges, so any required corrosion-protection repair should follow the product specification.
What is the most important factor in a successful installation?
Accurate layout is a good starting point, but the result depends on the complete system: suitable posts and foundations, compatible fasteners, correct mesh attachment, appropriate corner support, and inspection before handover.
Conclusion: A Good Fence Starts with a Good Installation Plan
Installing a welded wire fence successfully requires more than fastening mesh to posts. Accurate measurements, suitable foundations, correct post spacing, careful panel or roll installation, and attention to corners and slopes all contribute to a reliable result.
For contractors and project buyers, it is worth confirming the fence layout and installation requirements before ordering materials. Mesh specifications, post dimensions, brackets, gate details, and ground conditions should be considered together so that the components work as a complete system.
Qunkun Metal supplies welded wire mesh and fencing products for international buyers, distributors, and project requirements. When requesting a quotation, provide the intended application, fence height, mesh opening, wire diameter, panel or roll dimensions, quantity, and destination. These details help establish a suitable product specification before installation begins.
Previous: None
Next: 358 Fence vs Welded Wire Fence: Which Is Better for Your Project?
How to Install a Welded Wire Fence: A Step-by-Step Guide for Contractors
Pulished on Oct. 23, 2026
358 Fence vs Welded Wire Fence: Which Is Better for Your Project?
Pulished on Oct. 20, 2026
What Are the Advantages of Chain Link Fence? 8 Benefits for Commercial and Industrial Projects
Pulished on Oct. 16, 2026
How to Choose Farm Fence for Cattle and Horses: Wire, Height and Design Guide
Pulished on Sep. 23, 2026
How Is Chain Link Fence Made? Manufacturing Process and Components
Pulished on Sep. 18, 2026
358 Security Fence vs Chain Link Fence: Security, Cost and Application Comparison
Pulished on Sep. 15, 2026
Why Choose Welded Wire Fence for Security and Protection?
Pulished on Sep. 07, 2026
358 Security Fence Specifications and Applications Guide
Pulished on Aug. 27, 2026
How to Install a Welded Wire Fence: A Step-by-Step Guide for Contractors
Pulished on Oct. 23, 2026
358 Fence vs Welded Wire Fence: Which Is Better for Your Project?
Pulished on Oct. 20, 2026
What Are the Advantages of Chain Link Fence? 8 Benefits for Commercial and Industrial Projects
Pulished on Oct. 16, 2026
How to Choose Farm Fence for Cattle and Horses: Wire, Height and Design Guide
Pulished on Sep. 23, 2026
How Is Chain Link Fence Made? Manufacturing Process and Components
Pulished on Sep. 18, 2026
358 Security Fence vs Chain Link Fence: Security, Cost and Application Comparison
Pulished on Sep. 15, 2026
Why Choose Welded Wire Fence for Security and Protection?
Pulished on Sep. 07, 2026
358 Security Fence Specifications and Applications Guide
Pulished on Aug. 27, 2026